Clipping
In the upcoming sections, we will delve into detailed explanations of animations that involve clipping images or geometries.
Clipping Buffer
This animation enables the creation of a unique effect through gradual clipping using a clipping buffer geometry. A clipping buffer geometry is a distinct shape that can be drawn using the menu option “Draw => Clipping Buffer.” Essentially, it is a polyline with buffer distance parameters used to generate a polygon along the polyline.

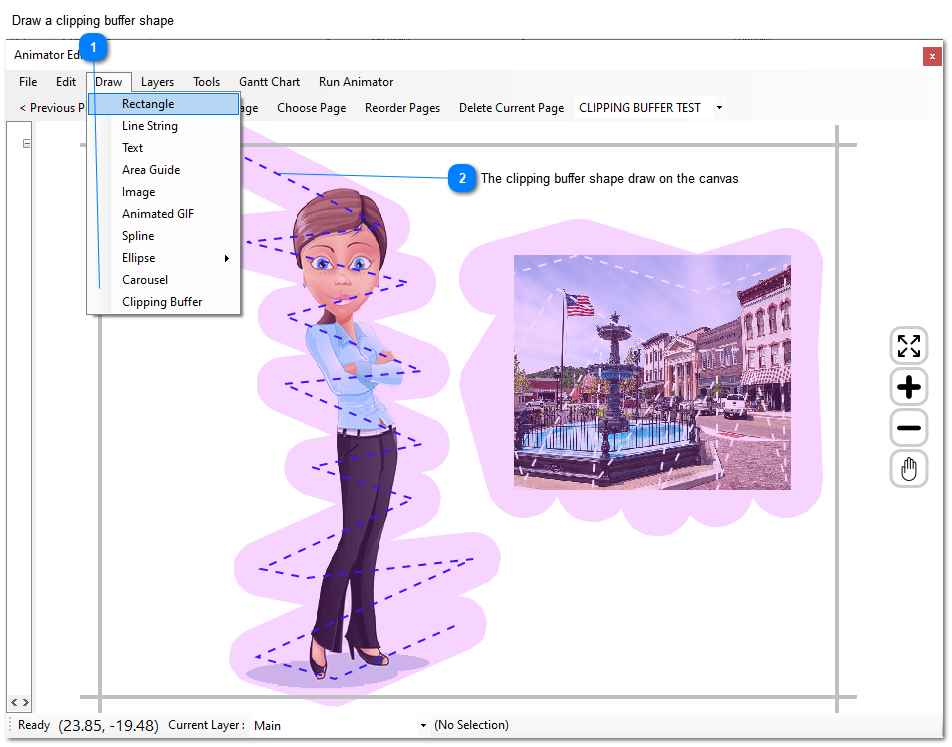
- Draw a Clipping Buffer.- Use this menu option to create a clipping buffer shape.
- The clipping buffer shape draw on the designer.- The clipping buffer shape drawn on the designer is essentially a polyline with a specified width or distance, forming a polygon along the polyline.
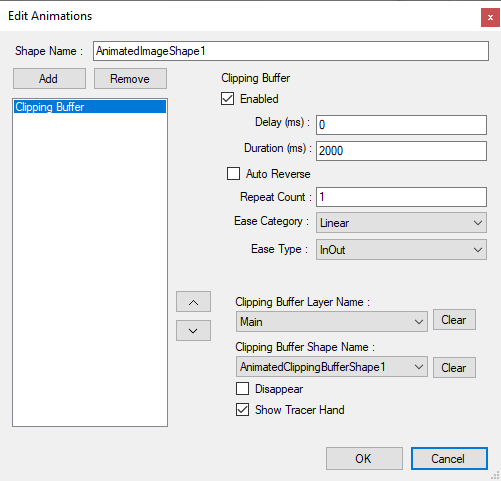
After drawing the clipping buffer shape, proceed to add a Clipping Buffer animation and apply it to the desired image. The animation editor is illustrated in the following screenshot:

- Clipping Buffer Layer Name.- The name of the layer containing a clipping buffer geometry.
- Clipping Buffer Shape Name.-The name of the clipping buffer geometry or shape within the specified layer.
- Disappear.-Check this box if the image (or any other geometry) should gradually disappear from the canvas instead of being revealed by clipping the buffer geometry.
- Show Tracer Hand.- Check this box if a default hand image with a pencil should be displayed, tracing the gradually appearing image. The hand image is positioned at different locations along the buffer based on the elapsed time.
Clipping Shape
Clipping involves the process of trimming a geometry using another geometry as a reference. For example, an image shape can be clipped by employing a specific rectangle or polygon as a reference. The visibility of the image depends on its position relative to the given rectangle or polygon. The image will be fully or partially visible when inside that reference shape and completely invisible if it lies outside the specified region (a polygon can also serve as a clipping region).
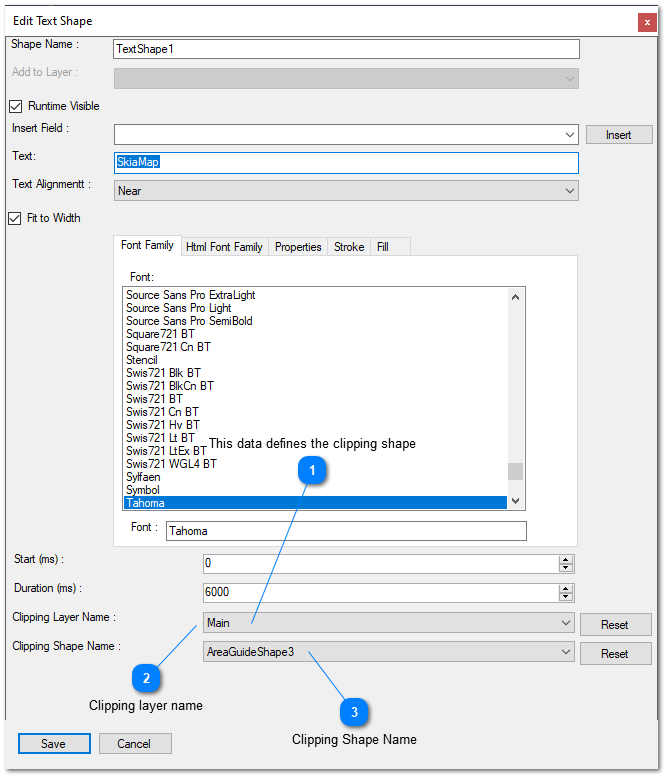
When editing the properties of a shape, you always have the option to define a clipping shape. This option is available in all distinct editors for shapes, as shown in the following screenshot depicting the properties of a text shape:

- Clipping Layer Name.- Specifies the layer name, chosen from the list of layers, where the shape used as a clipping region is located.
- Clipping Shape Name.- After selecting the layer, this combo box will display all the shapes in that layer. You can choose one of the shapes to be used as the clipping region.
Please click on one of the shapes below in order to open animations that includes clipping shapes.
